
Train

7 triathlon training tips
Here are the 7 best ways of improving your training and making sure everything is all set for your next triathlon event.
Once you’ve committed to a triathlon, here’s what you need to know for tackling your training for the big race. Always remember: nothing new on race day.
Find your next triathlon event
1. Train in the Conditions
Swimming in open-water makes a massive difference to speed and energy spent trying to fight even the slightest current. Suddenly finding yourself out of the safe confines of your local 25 metre pool can be pretty intimidating. Particularly when something in the water touches your leg. It’ll all be completely fine and harmless as soon as you take the plunge, so why not get over that fear before the actual race day and train in it.
2. Practice the transitions
Particularly if you’re looking to make a new PB, transition training is important. You don't want to finish the swim on race day only to have a wrestle with your wetsuit. It’s often just about feeling that bit more confident of your transition routine — what to take off first, whether you’re going to eat, and how to race your bike to the cycle start-point the fastest. If you’ve never done a transition before, it’s worth practising beforehand just to steady your nerves. Twenty minutes of doing it a couple times will help, especially as you bustle in and around the elites.

3. Know your strengths
Not many people will be absolute experts in all three disciplines, but most people will have one or two legs they specialise in. It's important to set out a good strategy so you know when to push and when to be conservative. So while you may lose out a bit on the swim, if biking is your thing you might be able to overtake some of the people ahead that way. Similarly, if running is your strongest suit, you don't want to have emptied the tank before you get there.
4. Work on your weaknesses
Having said that, if you know that you’re already a very able runner, then try and avoid seeking easy training gains by focusing mainly on that. It’s easy to do your favourite training and then check out for the rest of the week. But if you can’t cycle or swim, you can make the ordeal a whole lot harder for yourself. So make sure you focus on all aspects of the triathlon, with specific focus on your weaker disciplines. That way your stronger suit will allow you to excel rather than make up for lost time.

5. Get to grips with the ‘bricks’
A brick is doing two disciplines back to back. So that’d be completing your swim and immediately biking with no break, or moving from swimming to running. Especially for your first brick session, you'll find that moving upright after you’ve worked your whole body will be a dizzying struggle. And your legs will feel like bricks themselves as you get off your bike to start your run. But it's better to work on that in training then feeling it for the first time in the race. Your triathlon training then of course will need to include practicing the transition moment, and the ability to keep going afterwards.
6. Practice eating on the go
The clock is always going and won’t stop just because you do. So if you’re going to eat (which you absolutely should) you want to be doing something at the same time. Whether it’s while you’re clipping your bicycle helmet on or mid way through your bike ride; make eating as efficient as possible. If it’s the latter you should train the same and check that you can actually eat comfortably while cycling. Work out when eating suits your stomach as well so that you don’t eat and then realise that it was a bad decision. Energy gels can do funny things to your gut, so make sure you know what you're doing in advance.

7. Be flexible with your training
As with training for anything, you’ve got to get the right life balance that you want. No training plan is worth sticking to to the last letter, and so long as you’re committed to your triathlon and have some discipline then you will be fine if you miss the odd training. Listen to your body and take a day off if you need to recover. Getting bogged down will just create the triathlon guilt trip that takes the enjoyment out of it.

6 obstacles you’ll find on your next obstacle course
Prepping for your next obstacle course? This list will give you the inside scoop on what to expect and how you can prepare for it.
So, you’ve signed up to your next challenge — an obstacle course — but now you’re scoping out the most common obstacles so you can learn how to tackle them before event day. Look no further. These are the 6 most common obstacles you’ll find.
1. Monkey bars
Do you remember monkey bar sessions? Spending your childhood swinging about on the monkey bars that appeared in every playground? Well now you can reenact your childhood memories as almost every obstacle course will have some form of monkey bars. Some courses opt for traditional monkey bars while others make it more challenging, perhaps being placed over water or on an incline.
To tackle this obstacle, try and wipe down your hands before you start swinging (this may not be possible if you’re already covered in mud), swing your legs to help with momentum and don’t rush it. Before event day you could practise with hanging on a pull up bar while in an active position, doing pull ups or just find your local monkey bars and practise on them.
2. Ice bath
This is a pure test of mental and physical grit. But that's why you're here?! Normally you’ll have to slide down into the ice bath and then wade through it and come out the other side. The shock of hitting the ice water is immense, but the satisfaction as you wade out the other side knowing you’ve just pushed your limits is enough.

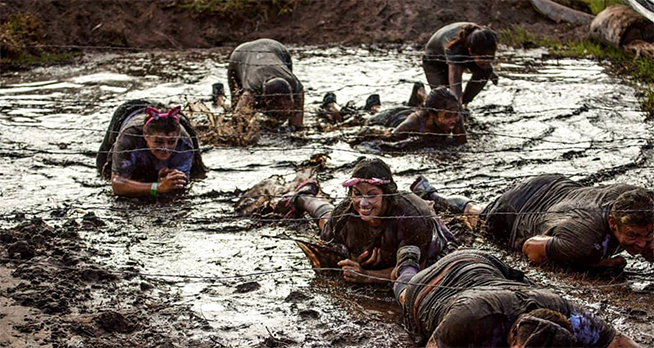
3. Army crawl
An army crawl tends to make an appearance in obstacle courses and the trick is to get low, stay low and go quickly. Normally they’ll come with a boat load of mud that you’re crawling through, so try and pick your path through it all. To prepare for these obstacles, core exercises help so add in planks and bear crawls to your training plan.
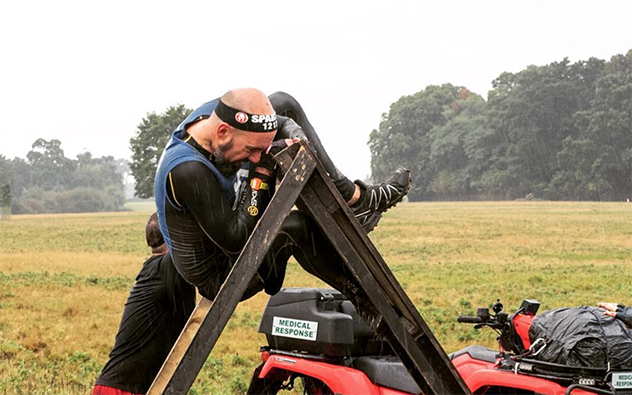
4. Inverted walls
Inverted walls can range in height but are usually a high wall that is angled towards you and the difficulty is the hangover nature of them. A good tactic for tackling these is to hang from the top of the wall, and try and and hook your heel over the ledge. From here, you’ll need a combination of leg strength and upper body strength to roll yourself over the wall. Again for these types of obstacles working on your chin ups and pull ups will help on event day.
5. Ropes
Every obstacle course loves throwing in a rope challenge and these come in all forms. It could be a rope climb, where upper body and grip strength is required or a rope traverse, taking you over a pool of water. Either way it’s almost guaranteed to make an appearance. To help with these before event day, try adding hanging knee tucks to your training to work on your upper body and grip strength.

6. Mud
Ok, this is not really an obstacle as such, but there will most likely be colossal quantities of the stuff at any obstacle course event. Not only to run through, but also covering you. Be prepared to be weighted down by mud throughout the event, but remember to enjoy it, it's all part of the fun.

Ready for a new challenge? Check out obstacle course events near you below.
Editor's note: This article was originally published on October 18th, 2018 and updated on April 15th, 2021 for accuracy and comprehensiveness.

How to train for an Ironman
These are the most important things to focus on and remember in your Ironman training. Change your training and lifestyle to see great results.
Taking on an Ironman is a huge challenge. Not only is the event itself a mammoth feat of endurance, but training is also a massive commitment. Here’s what you need to know about preparing yourself for your Ironman.
Before starting any kind of training plan, first you need to establish if you can do an Ironman. It's a huge challenge and not something to be taken lightly, so check your current ability before committing.
Can you swim? You should be capable of completing 3 1-hour swim sessions a week. You’ll want to aim to hold a pace of 2:00/100 yards for the 2.4 mile swim (around 1hr20mins overall).
Can you ride? You should be able to comfortably cycle for around 2 hours. You’ll want to aim hold an average speed of around 15 mph for the 112 cycle (around 7hrs30mins overall).
Can you run? You should feel comfortable running for an hour and a half. You’ll want to aim to hold a pace of around 10mins per mile for the 26.2 mile marathon run (around 4hrs30mins overall).
If you can do all of that then you would finish around the 13 hour mark. The time limit is 17 hours so you would have room to spare if you needed to slow down.

Get used to heart rate training
Your heart rate is a great indicator of the effectiveness of your training and your conditioning. This will also give you an idea of how intense your training sessions are since you will know how hard you’ve been working.

Start early
Lots of athletes leave their training too late and this is the best way to ensure that the Ironman won’t go well. If you really want to take your Ironman seriously then you will want to start your training at least 6 months before the date of the big race. The earlier you start your training plan, the better prepared you will be on the day.
Be flexible
Don’t get bogged down if you have to miss a training session for any kind of reason. Your training plan shouldn’t be so strictly rigid that you can’t adapt it for any reason. If you’re feeling tired and your body is crying out for a day off, do it and make the most of a rest day.
Pre-empt your grumpiness
Before you start on this mammoth journey of endurance, be sure to warn your friends, family, colleagues or just anyone you’ll ever see again, that you are not going to be the happiest you’ve ever been for the duration of your training. When you’re taking part in as much exercise as you will be, it’s common to get cranky as a result of tiredness and fatigue so it’s best to forewarn everyone you know.

Keep on going
For a lot of sessions, you’ll be feeling pretty good and feel like you’re smashing it. For the rest of your training you’ll feel pretty empty and flat and tired. This is perfectly normal and you will have to just keep trudging along and get the training done. Your body will slowly get used to the training load and you will start to feel less like you’re just getting it done and more like it’s effective training, but you will have to work hard to get to that point.
Train consistently
Having one great day of training to then find you’ve just put yourself in a hole for the next few days isn’t the right way to train. Not every single training session should be a test so try and keep the intensity of your sessions consistent so you don’t empty your tank and hinder the rest of your training.

Recovery is key
A training session is only as good as its recovery. It’s all well and good having a great session on the bike and getting lots of work done, but if you don’t recovery properly, then you can end up with an injury or illness. Make sure you don’t forget to task rest days to give your body a chance to recover from the strain you’re putting on it. Rest, along with proper eating and drinking will massively help keep your body in shape and your training on track. You will need to keep your energy stores replenished so as soon as you finish a big workout, get some fuel in so you’re ready for the next one.
A refreshing ice bath is a great idea to sooth your tired muscles and to relax you after a tough training session. However, nothing can beat a good sleep when it comes to recovery. So make sure you’re getting as much sleep as you feasibly can do to avoid fatigue.


5 trail runs you can fit in before work (Boulder, CO)
Because that 9am meeting will be so much more interesting after some views and fresh air
1. Dakota Ridge on Mount Sanitas
This is a good one if you’re short on time but keen for a good workout — you can run in from town and head up the 1-mile Dakota Ridge Trail before running back down the slightly longer Valley Trail for a 2.3-mile round trip.Bed-to-Desk time: 1 hourTrail distance: 2.3 milesView score: 3.5/5For more details on this trail, head here.
2. Mount Sanitas Loop
If you really want to get your quads burning, head up the 1.8-mile Mount Sanitas trail. The steps will hit you hard, but the views are well-worth the climb. Try getting up there for sunrise.

Bed-to-Desk: 1 hour 45 minutesTrail distance: 3.1 milesView score: 4/5For more details on this trail, head here.
3. Sunshine Lion’s Lair Loop
For a slightly longer but less busy and more runnable loop, head to Lion’s Lair. This 5.1-mile trail is very smooth, and the ascent is more gradual than the nearby Mount Sanitas. The views are just as rewarding, though.Head back down the way you came, or, for a more technical descent, try out the Mount Sanitas trail.Bed-to-Desk: 1 hour 30 to 2 hours, depending on which descent you takeTrail distance: 5.1 milesView score: 4/5For more details on this trail, head here.
4. Green Mountain
For high probability of a professional ultra runner sighting and a lot of up, head to Green Mountain. Take the Ranger Trail (South) for some steep hills and switchbacks leading you to epic views East & West for miles, before descending on the Saddle Rock Trail. This trail is great if you’re keen for varying terrain and a lot of ascent.Bed-to-Desk: 2 hoursTrail distance: 5 milesView score: 4/5For more details on this trail, head here.
5. Royal Arch
This trail is short, but packs in a lot of ascent; it gets steeper and steeper until you reach the summit so don’t use up all your strength in the first half mile. The steps will test your legs, but the views will make you forget all about the pain.Bed-to-Desk: 1 hour 45 minutesTrail distance: 3.2 milesView score: 4.5/5

For more details on this trail, head here.Now set your alarm clock and go catch those pre-work views.

8 trail running tips
These are the most important things to focus on when moving from road running to trail running. Following these simple steps will make a huge difference.
Even if you’re already an amazing runner, it can’t hurt to take on board a few trail running tips if you haven’t done it before. It will be a pretty different running experience for you, especially if you’re used to fast-paced and competitive city runs.
1. Slow down
All trails are different, so it’s pretty tricky to gauge any kind of trail speed. So definitely until you know at least a bit about what you’re capable of, make a point of slowing down. If you’re competitive, it could take a bit of willpower, but your road-running speed will be much, much faster than what you can probably manage on a trail even when you’re at peak fitness. It’ll also give you the chance to strengthen those muscles you don’t normally use so much — even just in your ankles, which won’t be used to the bumpy trail ride yet and might suffer from unexpectedly rolling over.

2. Forget about everyone else
Apart from enjoying a chat or two with other trail runners, you want to be careful not to get caught up in matching their speeds. Everyone will have their own rhythm, particularly starting out. You’ll be good at different parts of the trail, and there’s nothing worse than thinking you have to sprint up a hill because someone else has. A relaxed approach to trail running will be the best starting point for you - work on competition later on.
3. Take small strides
Smaller and faster steps will massively help with trail running. For going uphill it’s the same as going up stairs - taking them quickly and one at a time is easier than making massive lunges and taking 3. Generally speaking, smaller strides will help you land on the middle part of your foot rather than the heel, which will help you propel yourself forward, keep your balance, and protect yourself a little from knee injuries.
4. Keep your eyes on the trail
Usually when road-running the advice is to look up and further ahead. Of course you still want to keep good running form (back and neck straight) and make sure every so often you take in what’s probably an amazing view. But at the same time nature’s out to get you — be careful of tripping up on things in the middle of the trail that will put your trail running adventures to a quick halt.

5. Core, foot and ankle strength training
Core training is good for any running. Going uphill (and downhill for that matter) it will definitely make your life easier. And making sure your feet and ankles are as strong as possible will also help you stay stable when you inevitably do a little roll over on a rock. You can train them up and develop your stability generally by investing in a wobble board — and then maybe you can work on getting faster and more confident on the trails.
6. Build gradually
Don’t overstep yourself too soon. Any training plan for any other running discipline will advise you to increase at a rate of 10%. Trail running is definitely no different, except for the fact that it’s even more important to restrict yourself (maybe even to less than 10%) - the last thing you want is to go too far, injure yourself mid-run, and discover yourself in the middle of nowhere and a way away from home.

7. Over-prepare with drinks and snacks
You don’t want to carry lots, obviously. But you can take some precautions in case you end up a little lost, or a bit more tired than you expected. It’s strenuous work and your enjoyment might be determined by having one more or one less energy sachet or water stop provision than you thought you’d need.
8. Mix it up
You’ve got hundreds of trail runs that you can do. And they’re all different. So take advantage of them. It’s a pretty cool thing to do, and it’s not worth letting yourself get bogged down by what other people say or worrying about x, y, and z.

What goes up must come down: working out the impact of hills on the difficulty of a race
Tim Beeson-Jones is fresh out of his fluid mechanics PhD at the University of Cambridge and has been to developing our analytical tools at LetsDoThis.com
Try racing up Ben Nevis at a speed that would impress a mountain goat and you’ll find it’s a lot harder than running the same distance on the flat. But by how much? Tim has been doing a bit of research to try and find out.
William W. Naismith was a Scottish mountaineer who walked upon mountains green and pastures pleasant towards the end of the Victorian era. A hiking legend, he completed the first winter ascent of the North-East Buttress of Ben Nevis in 1896, and at the age of 60 he walked the casual distance of 100km from Glasgow to the summit of Ben Lomand and back in just 20 hours. Naismith founded the Scottish Mountaineering Club and, fortunately for us, documented his trips.

The last sentence of one of his post-jaunt reports was the very helpful note that “men should allow 1 hour per 3 miles on the map and an additional 1 hour per 2000 feet of ascent”. It has been noted that, for most runners, this is roughly equivalent to saying “to account for any changes in elevation, add on 8 times the distance of ascent to the distance you thought you were going”. This is really handy for people who find themselves orienteering in hilly areas as they can then work out the Flat Equivalent Distance (FED) of, say, going over a hill rather than round it and then choose the shorter route. But how accurate is this rule?
We reckon with its unrelenting up’s and down’s, that 42k marathon is really more like a monster 58k ultra…
Naismith arrived at this equivalence through a lifetime of experience (and also a good old fashioned finger in the air). It is, however, a slightly simplistic model insofar as the additional time doesn’t explicitly depend on the slope of the hill, just the total ascent. It also doesn’t account for what happens when you’re going downhill. Indeed, one might expect a shallow downhill gradient to be beneficial until a critical steepness is reached, at which point one might expect further steepness to slow you down as you try and keep your balance. We’ve used the research from a leading UK sports university to gain insight into the relationship between the additional effort required and slope (including both positive and negative incline). Building on this, we’ve calculated the FEDs for a number of different popular races and found some interesting results. For example, if you were disappointed with your time on the CTS Dorset Marathon then fear not! We reckon with its unrelenting up’s and down’s, that 42k marathon is really more like a monster 58k ultra, so don’t sweat it. Or in fact do…loads.

This information will do a few things:
- It feeds into the difficulty rating we’re developing so you know what you’re signing up for when you book an event through letsdothis.com.
- Once you’ve decided to take the plunge, if you tell us roughly what time you might run it on the flat (or your target overall pace) then you can use the split guide we’re developing to balance out the different sections, with hilliness factored in.
- Finally, this info feeds into the predictor we’re developing, which will give people times to aim for given past performances and their training data. Watch this space!

Your guide to running nutrition
There is no one-size-fits-all approach to running nutrition. In fact, what works perfectly for one runner may work terribly for another.
That’s because what you eat and when you eat it is very individual.
But by taking the time to find what works best for you, you’ll be able to reach your goals quicker – whether it’s a personal best or a bid to feel better when you run and quench the “runger” for good!
What nutrients do runners need?
Macronutrients, vitamins, supplements, when and what to eat pre and post-run – even if you’re a seasoned runner there’s a whole lot to think about when it comes to running nutrition.
Let’s start with macronutrients and how they impact running:
- Carbohydrates: the ultimate fuel for your muscles.
- Protein: repair and recover your muscles and body to withstand the training intensity.
- Fat: backup energy source and also helps your body absorb essential vitamins.
- Vitamins and minerals: needed for regular bodily functions - eat plenty of veg.
When it comes to macronutrients, you need them all. They all play their part in the running process, from intense activity to recovery.
There’s really no need to overcomplicate it. As a runner, you should work towards a varied and balanced diet of macronutrients. That means a healthy mix of carbohydrates, proteins, fats, and plenty of fruit and vegetables.
Eating and running
Timing is everything. And, as we mentioned, it’s personal. Only you can decide when the best time for you to eat is around your running schedule.
But don’t fear, we do have some tricks for working that out – as well as some intel from years of practice!
Time your pre-run meals and snacks
The timing of your pre-run meal and snacks are essential.
If you plan on eating a larger meal beforehand, then we’d suggest waiting 2 to 3 hours before running to ensure proper digestion.
Snacks can be a lot more forgiving. For example, most people can eat a banana 20-30 minutes before a run with no issues. Find what works for you and stick with it.
Always avoid eating a large meal before running – this can cause stomach distress and can also directly lead to the dreaded stitch.
Instead, eat a smaller meal or snacks such as oats, toast, yoghurt, a granola bar, or fresh fruit.
What to eat during a run
If you’re training for a marathon or just a fan of going long, you’ll want to eat while running (typically upwards of 60 minutes training duration).
A good option for quick energy are carbohydrate sports gels, gummy bears, or other easy-to-digest foods.
You can bring nuts or energy bars, but your body will struggle to digest the food quickly. If it isn’t digested while you’re running, you won’t get the energy benefits.
Gels can play havoc with some peoples’ stomachs – so be sure to play around with your mid-run nutrition to find out what works best for you and your stomach.
What to eat after a run

Once you’ve finished your run, especially if it’s a long run or hard session, you’ll want to replenish those last calories and energy stores.
That way you’ll provide your body with the essential nutrients it needs to stimulate recovery.
If you’re short on time, a recovery shake containing carbohydrates and protein is a great option. You can also try something sweet like chocolate milk if it’s more convenient.
If you have time on your hands, we suggest cooking a full, hearty meal that ticks off those macronutrients, like:
- Tuna or salmon with potatoes or rice
- A veggie and cheese omelette
- Spaghetti bolognese or chilli
- A sandwich containing a source of protein
Ultimately, your body will respond best to a balance of carbs, protein and fat.
Do runners need supplements?
Some runners choose to take vitamin and mineral supplements to help optimise their body for training and recovery. From fish oils to vitamin D, there are a range of supplements out there that can help with your body and brain health.
If you’re able, we’d suggest trying to get most vitamins and minerals through your diet. That means eating whole foods, fresh fruits and vegetables, oily fish, and healthy fats (think nuts and yoghurt).
Most doctors recommend only considering supplements when you can’t obtain the essential vitamins and minerals through whole foods. For example, if you don’t eat meat or other animal products, you’re at an increased risk of vitamin D deficiency.
Supplements should be just that, used to supplement your food intake if you have a deficiency or you can’t get what you need from your diet.
If you do think you have a deficiency, always consult a medical professional before using regular supplements.
Hydration guidelines
All too often, the importance of hydration when running is overlooked. What you drink, and how often you consume fluids plays a huge part in your running performance and recovery.
You should be aiming to drink a minimum of 2 litres of water (women) and 2.6 litres (men) a day. And on training days? Throw in an extra litre – this is especially important on hot days.
If you want to be more accurate with your hydration, you can weigh yourself before a long run and weigh yourself after your run.
The difference in weight (lbs) is the fluids you lost when running. Aim to replenish these fluids in the following hours after completing your run.
Nutrition for races
Nutrition for race day should remain similar to your regular eating habits. If anything, your training nutrition should be part of your preparation for your next event.
Your training is the perfect time to practise race day nutrition and hydration. Practice eating and drinking while training, and play around with different foods to see what sits best with you.
Find out what foods work best, what foods to avoid, and most importantly, what dessert you’ll eat after crossing the line…
Race day nutrition
If you’re running longer distances, you may choose to carb load before your event.
That means more pasta, potatoes, rice and bread in the days leading up to race day. Though that may sound dreamy, be sure not to load it all into one sitting before the start line (this is a recipe for disaster!).
Other than that, practise the nutrition methods you’re familiar with in your training and we know you’ll be just fine.
Running nutrition is individual - find what works for you
There is no best diet for runners or a one-size-fits-all running nutrition plan that works for everyone.
While there is a plethora of advice and guidance on running nutrition out there, ultimately, it’s about finding what works best for you.
That could mean following a strict marathon diet, running fasted, or eating the same as you always do.
As always, practice makes perfect.
Just don’t forget the golden rule: try any new snacks or pre-run meals in training, not the evening before or during your next event!

Heart rate training: how to run using heart rate zones
When it comes to running, you’ve probably heard of all sorts of metrics for your performance,
from sprint times to marathon distances. But what about heart rate training?
By calculating heart rate zones, you can improve your fitness and push your limits – whether
you’re doing short bursts or going the distance.
What is heart rate training?
Heart rate training is used to train your aerobic system with beats per minute (BPM). When
you’re in an aerobic state of exercise, such as gentle running, your body is being fuelled by
oxygen.
Anaerobic states, meanwhile, are when your body is starved of oxygen. That happens when you’re going harder – like in high intensity interval training session.
With heart rate training, it’s all about getting into different heart rate zones. These are incremental and correspond with how much effort you’re putting into your workout.
What are the benefits of heart rate training?
Running based on heart rate training zones can help you to monitor your intensity without
overdoing it. This may decrease your risk of injury and improve your all-round fitness. The
result? Longer mileage or even faster miles – and one step closer to reaching your goals.
Who should use heart rate training?
Heart rate monitors used to be the preserve of elite athletes only, dating back to the 1980s. Today, you can buy them cheaply as running watches or straps placed around the chest.
You don’t have to be a pro runner to improve with heart rate workouts. In fact, if you’re a beginner, measuring your heart rate is a great way to determine your base fitness and help form the training plan that will push you towards your goals.
If you’re more experienced, you’ll benefit from understanding what constitutes high exertion
versus a more relaxed run. This is great if you’re speed training or increasing your distance.
Factors that can affect heart rate data
Before you start looking at your heart rate training zones, remember that multiple factors will
affect your BPM.
These include:
- Extremes of heat and humidity
- Lack of sleep or fluids
- Certain medications
- Running uphill
- Caffeine
So, if you’re having an off day and think you should have been at your zone 2 heart rate rather
than 3, this might be why.
The different heart rate zones
To get an idea of our base aerobic training zone, it helps to split our BPMs into heart rate zones.
These essentially correspond with how much effort we’re putting into our exercise, for example:
Zone 1
This is around 60%, ideal for warmups and cooldowns.
Zone 2
This is around 70 to 80%, allowing you to hold a conversation while training.
Zone 3
This is between 81 and 93%, whereby you cannot talk for more than a few broken sentences.
Zone 4
This is anywhere from heart rate zone 3 up to 100% – expect hard work, ideal for sprinting!
How do I calculate my heart rate zones?
To calculate heart rate zones, you need to look at your max HR.
A simple calculation is to take your age off 220, so a 30-year-old runner’s max HR would be around 190. Of course, this can vary depending on your fitness levels, plus the external factors, such as medications.
To gauge your heart rate zones, you’ll need to look at the percentage of your max HR.
For example, zone 2 training for a 30-year-old with a 190 max HR would be:
190 x 70 to 80% = 133 to 152 BPM.
Which zones should I train in?
You can train in all four heart rate zones, but it will depend on your goals.
For example:
Zone 1 training = ideal for warmups and cooldowns around training sessions.
Zone 2 training = ideal for base training and longer runs – your aerobic training zone.
Zone 3 training = ideal for marathon training or increasing aerobic fitness.
Zone 4 training = ideal for intervals and sprinting to improve running efficiency.
You should mainly focus on heart rate zones 1 and 2 to avoid injury, but you can mix up your
workouts to improve overall fitness.
What equipment do I need for heart rate training?
The most common equipment for heart rate training is a running watch. These handy devices also measure pace, distance and time.
If your watch doesn’t have a built-in heart rate monitor, try a monitor that’s compatible with your watch – for example, a Bluetooth strap placed underneath the chest.
Check your watch is firmly (not too tight!) on your wrist, and that your strap is underneath
your chest or sports bra. If you can’t get a reading, try moistening the paddles.
Follow your heart
With the right pacing, heart rate training is a great way to improve your overall fitness and
make sure you don’t over or under train.
It’s time to push your limits, watch your miles go up and your PBs go down… Plus, it’s a great excuse for some fancy new gadgets!

5 performance-boosting training tips
Whether you’re running a half marathon or a 10K, pin-down a success strategy and get set to achieve your best.
5 performance-boosting training tips
Whether you’re running a half marathon or a 10K, pin-down a success strategy and get set to achieve your best. Exactly how many grams of carbs is considered a good amount for carb-loading – and when should we start? When’s the right time to taper our training? We’ve got the answers in these five steps to marathon success.
1. Set your goals (and stick to them)
The first step to event success is deciding upon – and sticking to – your training plan. If you’re in the early stages and don’t yet have this in place, start by outlining your goals and how much time you realistically have to commit to them, then set yourself a structure. This should include a clear path for how you’ll gradually build your mileage and speed to reach your race-day goal within a realistic timeframe. Aim to train 3-5 times per week. If you’d benefit from a sense of accountability, apps like “Couch to 5K”, "Runna" or "Coopah" (and many more!) provide great guides. From 10Ks to marathons, there are plenty available, all geared towards helping you to reach different training goals.
2. Dress for success
Choosing the right kit well in advance of the event, gives you time to pick the gear that works best for you. Plus, you can train in it for a couple of months beforehand, to iron out any creases when it comes to common running gear issues like chafing or not having the right level of support. Everyone’s needs are different, but here are some key pointers for choosing your race day kit:
- Plan what you’ll wear, and start wearing it. Think about what you need from your kit. Do you need plenty of storage for gels? Make sure you factor this in. Details like this will help to maximise your performance. Plan for last-minute weather changes with buildable layers that you can easily throw on and slip off – and don’t forget to pack something warm for before and after the race.
- Don’t treat socks as an after-thought. Keep your feet at the top of their game by choosing the right socks. Opt for sweat-wicking, breathable synthetic fabrics over cotton. Cotton socks tend to hold moisture, which can cause problems with rubbing, blisters and sores.
- Wear your trainers in. Make sure you do this well ahead of the big day. It takes around 50 miles of running to wear a new pair in, so they need to be worn well in advance.
3. Use visualisation techniques
“Visualisation gives athletes a sense of being successful and overcoming difficult parts of races before they actually go through it”, says British Olympic Athlete, Lennie Waite. The PETTLEP visualisation framework is popular amongst novices and athletes alike when it comes to visualising each part of an event. This tool encourages athletes to focus on seven key factors.
- Physical. Picture your physical performance on the day in as much detail as possible. How do you feel? What pace are you running at? Any physical issues that you could do with tackling before the event?
- Environment. Imagine the sights, sounds and smells. This will help you to feel more comfortable on the day.
- Task. Think positively but realistically about how you will complete the task (in this case, the event) to a level you’re happy with. What would your dream finish time be and what do you need to do to get there?
- Timing. During your training runs, try to imagine the race in real-time, visualising each landmark along the way.
- Learning. You can adapt this framework over time, adding new details to your visualisation as your skillset improves before the race.
- Emotion. Try to picture the emotions you’ll be feeling before, during and after the event. Imagine that runner’s high, afterwards.
- Perspective. Do you visualise your run from a first or third-person perspective? Maybe you flick between the two. A first-person perspective is great for imagining emotions, whilst third-person is better for planning things that others see, like your posture.
4. Make a plan for tapering your training
Tapering – the process of slowly winding down your training to rebuild your muscles and energy stores in preparation for a racing event – is usually most effective when started after your last hard workout that falls around 10-14 days before your race. As you slowly decrease your training load, your body will begin to store glycogen, ready for a fresh burst of energy when you’re going for that personal best. Clever.
On the first week of your taper, drop your mileage to around 80% of what you usually run. During the second week – around seven days before your race – drop to around 50% of your usual mileage. A short run the day before your event will help to stimulate blood flow and can help to tackle any nerves, but fatigue-inducing long runs should be avoided.
5. Plan your pre-race carb-loading
It’s a good idea to start carb-loading two to three days before the event. As a rule of thumb, aim for 85-95% of your calories to come from carbohydrates, or 5-10g of carbs for every kilogram of your body weight.
After your taper runs is prime carb loading time, as this is when your body stores more glycogen, ready to fuel your run in those moments that matter.
Of course, don’t forget to get your cupboards stocked in preparation for your carb-rich breakfast around two-to three hours before the race. Aim for around 150g of carbs. Porridge and a banana is always a good choice, but make sure you try this as part of your prep, to avoid any potential stomach upsets on the day.
Finally, give yourself time to take stock of everything you’ve achieved. You’ve put the miles in for this and it’s nearly time to enjoy it. Good Luck!!
Inspiration. Delivered.
Sign up to receive personalised event recommendations, our monthly newsletter and the latest updates from the Let’s Do This community.